In the beginning bookbinding class that I taught in October and November at the Falmouth Community school, we made paste papers – they are a really easy and fun way to make decorative papers. It’s kind of like finger-painting for grown-ups.

Supplies, Including tempera Paints, Paste, Inks and a brush

Whit making some paste paper

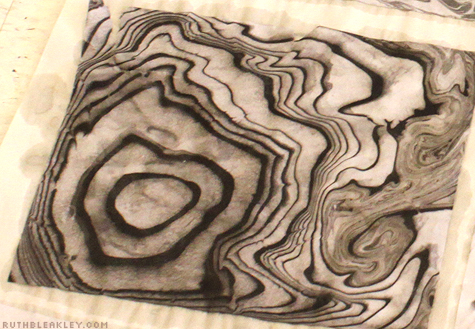
This is the paste paper I started in the first photo
You can make your own paste papers at home – first you’ll need some paste, which you can make easily with flour, water and a microwave.
The ratio of flour to water is approximately 1 tablespoon per 1/3 cup of water – one cup of paste made with three tablespoons of flour and 1 cup of water is a good amount if you’re making paste papers with other people and don’t want to run out – for my class I made 8 cups of the stuff! mmmm.
Stir up your flour and water in a microwave safe bowl – I often make mine in a pyrex liquid measuring cup. Whisk the flour into the water with a wisk or a fork – you can minimize lumps by slowly adding water to the flour, rather than adding flour to the water.
Put it in the microwave for 30 seconds on High – take it out and stir it, 30 more seconds, stir – you may see it start to change in texture – it’ll get kind of opaque and thick. Keep microwaving until it just starts to rise up in the center and is thick and gel-like – give it a good stir.
When the paste is a little cooler, separate it into smaller cups and add in whatever color you like of acrylic, tempera or liquid watercolor paints.
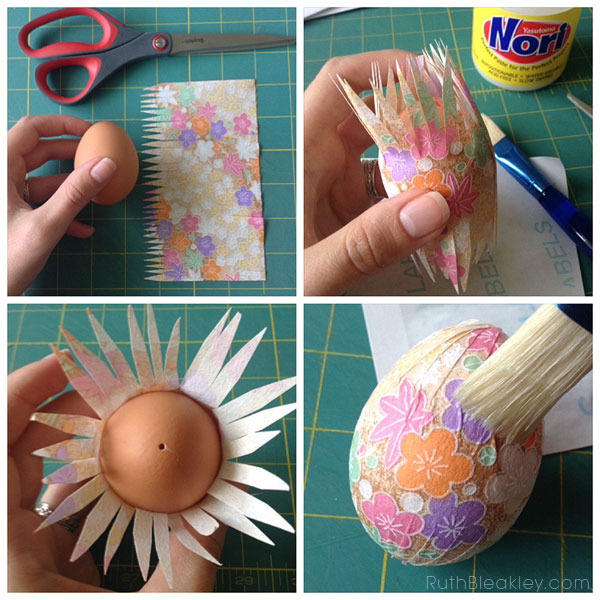
Brush it (or smear with your hands) onto a sheet of paper – I hope you put newspapers down to protect your table! When your paper is evenly coated with a layer of paste, take whatever object you like and carve a design into it – fork tines are great for stripes, crumpled paper is good for a textured look, bottles make nice circles.
Leave it to dry overnight – if it’s very wrinkly or curled, iron it on the back side. if you are using it to cover a book, the glue will smooth out any wrinkles.
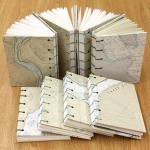
Here are some photos from My Beginning Bookbinding class at the Falmouth Community School this past October/November, where we made paste paper in the first class to use in our books for the following two classes.
Related Posts
Related Posts


Leave a Reply